My darling girls (3 and nearly 5) have been harping on for their own tutu skirts for a while now. Today was the day! While I has making them I put together a no-sew how to, these are super easy and quite cheap to make, perfect gifts for the little fairy-ballerina-princess in your life! I couldn't find a ruler, so chances are other mums can't either, so the measurements are nice and approximate.
For each skirt you need:
About 1 metre each of 3 colours of nylon net. It costs around $5 a metre and is 130cm wide.
About 1 metre of ribbon, I found the 20mm wide the easiest to work with.
Step one: Using a pair of pants that fit the fairy-ballerina-princess in question, measure enough ribbon to fit around her waist and allow approximately 30cm (3-4 adult palm widths) extra to tie a bow at the end.
 |
| Measuring the waist band |
 |
| Knots at the edge of the waistband |
Step three: My nylon net is 130cm wide, but is folded in half on the roll. Lay your 3 colours of nylon net (or two or four) on top of each other with the folds all together at the top edge. Cut strips of fabric 15cm wide (or about 1 and a half palms wide) towards the fold. Then cut along the folds to make each strip into two pieces. You should then end up with 12-14 strips of fabric from each colour (or a grand total of about 36-48 if you are using 2 or 4 colours), 15cm wide and 65cm long.
 |
| It doesn't matter if they're not straight or even! |
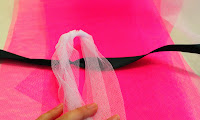
Step five: Keep doing this, keeping them tightly together, between the two knots on the ribbon. I found the first few the most difficult to do, then I found leaning on the pieces I had done against the edge of the bench helped keep the ribbon tight, which made the looping and tightening much easier.
All Done! Tie a bow around the middle of your fairy-ballerina-princess, tune into Concert FM (or similar) and let the dancing commence. I also used the scraps to make matching dresses for the girls special soft toy animals.


No comments:
Post a Comment
Please add a comment, we would love to hear from you!